To make sure your dedicated GPU is being used you can complete the following steps:
1. Open the ‘NVIDIA Control Panel’ or appropriate control panel for your dedicated GPU.
2. For the NVIDIA Control Panel; Click ‘Manage 3D settings’.
3. Under ‘Global Settings’ (highlighted in blue in figure 1), make sure ‘High-performance NVIDIA processor’ is selected from the drop-down list for ‘Preferred graphics processor:’, highlighted in the red box in figure 1.
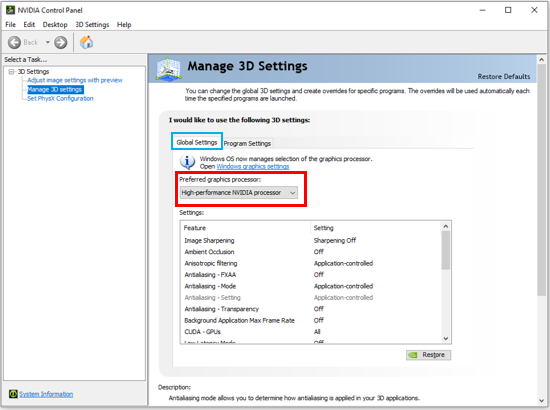
Figure 1: NVIDIA Control Panel, ‘Global Settings’.
4. Under ‘Program Settings’ (highlighted by the in figure 2a), click ‘Add’ and add the ‘Exoid Control Suite’ as shown in figure 2b, followed by ‘Add Selected Program’.
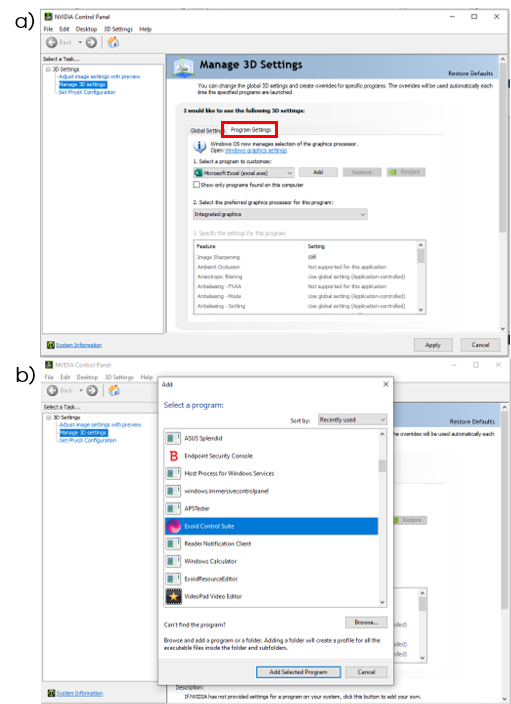
Figure 2: a) ‘Program Settings’ tab and b) Program selection.
5. Make sure ‘Use global setting (High-performance NVIDIA processor)’ or ‘High-performance NVIDIA processor’ is selected in the drop-down list for selecting the preferred graphics processor, as shown in figure 3.
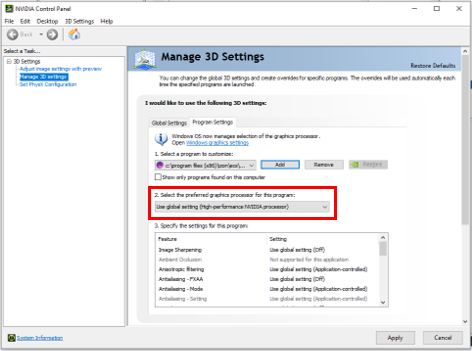
Figure 3: NVIDIA Control Panel, ‘Program Settings’.
6. The ‘Windows graphic settings’ can also be changed to ensure the dedicated GPU is being used. Click on the ‘Windows graphic settings’ indicated in figure 4.
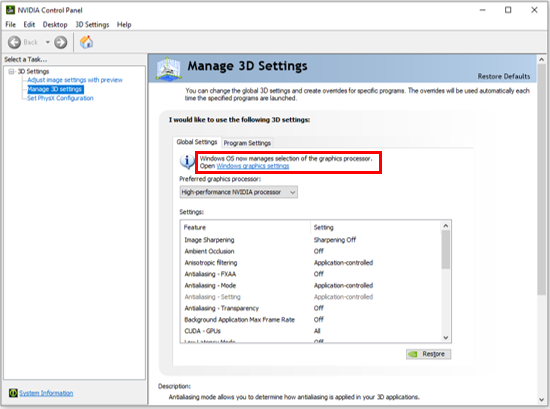
Figure 4: ‘Windows graphics settings’ link on the NVIDIA Control Panel.
7. Make sure the ‘Hardware-accelerated GPU scheduling’ is switched on, as shown in figure 5 (highlighted in red).
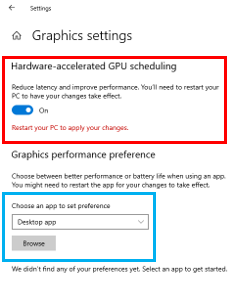
Figure 5: Windows Graphics Settings.
8. Choose the apps to set a preference using the drop-down list or ‘Browse’ function indicated by the blue box in figure 5.
9. Select Exoid Control Suite found at the following location:
C:\Program Files (x86)\Izon\ECS\Exoid Control Suite\bin
10. Click on ‘Options’ as shown in figure 6a, and select the Graphics preference as ‘High performance’ (shown in figure 6b), followed by ‘Save’.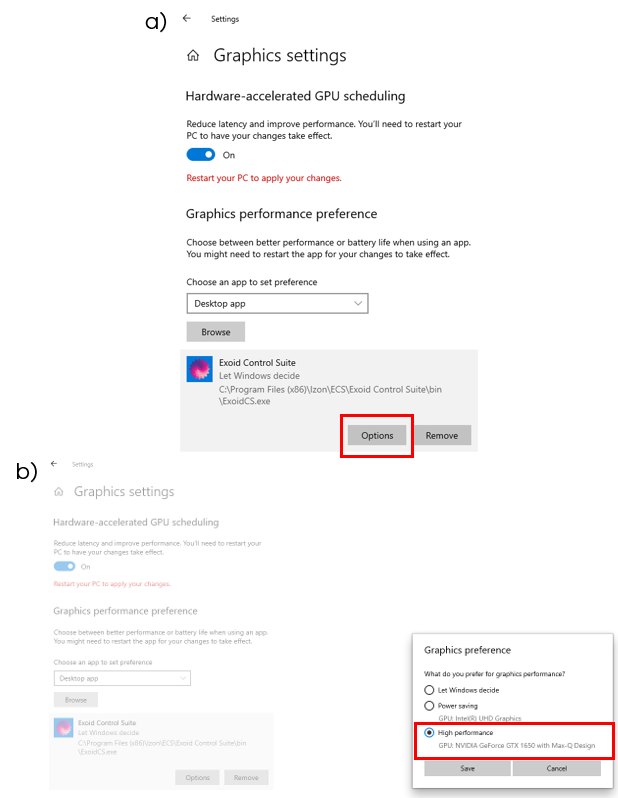
Figure 6: Selecting graphics preferences for chosen apps/programs.
11. Make sure you have clicked ‘Apply’ on the NVIDIA Control Panel, which can then be closed. The
Windows Settings can also be closed.
12. Restart your PC to enable the changes in preferences you have made.
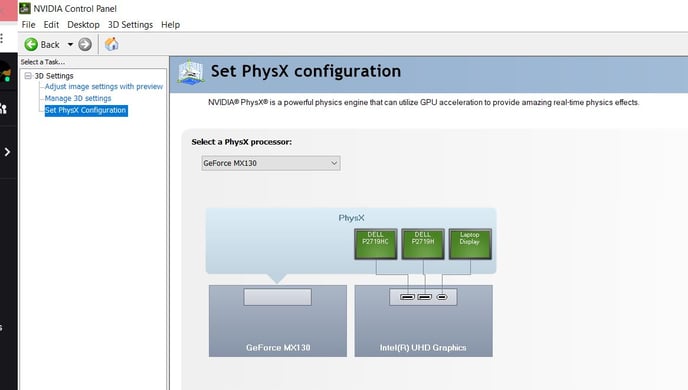
13. If you are still experiencing software issues, set the PhysX processor to the dedicated GPU as well, then restart the software.